 Burke Knows Words A vision for your life
When it comes to eliminating unwanted pests from your home or garden, the options can ...
Read More »


When it comes to eliminating unwanted pests from your home or garden, the options can ...
Read More »
Undertaking a kitchen plumbing overhaul can be a daunting task, but with proper planning and ...
Read More »
Nestled in the heart of a vibrant cityscape, Norwood Grand Condos epitomize luxury living at ...
Read More »
Choosing the right plumber for your home can be a daunting task. Whether it’s a ...
Read More »
Drain clogs can be a plumber’s worst nightmare, causing headaches for both professionals and homeowners ...
Read More »
Many gardeners understand that a plant in a container cannot rely on the potting soil ...
Read More »

When it comes to eliminating unwanted pests from your home or garden, the options can ...
Read More »


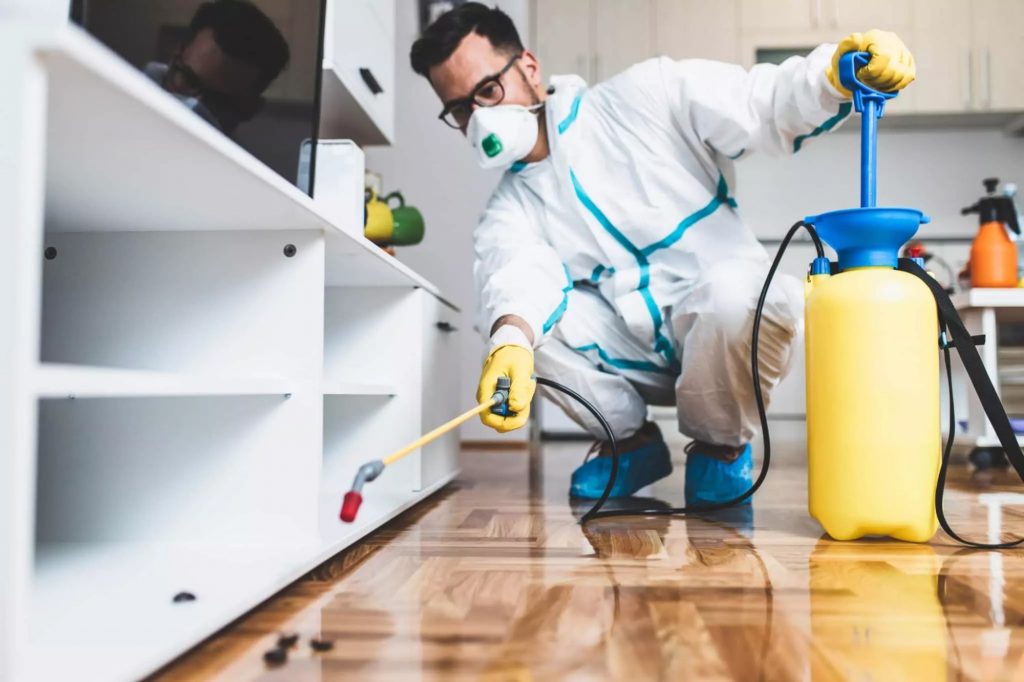
When it comes to eliminating unwanted pests from your home or garden, the options can be overwhelming. For those looking for reliable solutions in Buffalo, companies like Bed Bug Exterminators Buffalo offer a range of services to tackle even the toughest infestations. However, the age-old debate remains: natural vs. chemical pest control. Which method is right for you? In this article, we’ll delve into the pros and cons of each approach, exploring the benefits and drawbacks to help you make an informed decision. For instance, if you’re dealing with a severe infestation, Bed Bug Exterminators Buffalo may recommend a combination of natural and chemical methods to ensure effective results.
1. Introduction to Natural Pest Control
Natural pest control methods focus on using environmentally friendly techniques to deter pests. This approach often involves using physical barriers, traps, or natural substances to repel or eliminate pests. For example, certain plants, such as basil or mint, have natural properties that repel pests, making them a great addition to your garden. Additionally, sealing entry points and maintaining a clean environment can go a long way in preventing pest infestations. By adopting these methods, you can create a pest-free haven without exposing yourself or the environment to harsh chemicals.
2. The Benefits of Natural Pest Control
The benefits of natural pest control are numerous. Not only is this approach better for the environment, but it’s also generally safer for pets and children. Natural methods tend to be less toxic, reducing the risk of accidental poisoning or long-term health effects. Furthermore, natural pest control often encourages a more holistic approach to gardening and home maintenance, promoting a healthier ecosystem and reducing the need for chemical interventions.
3. The Drawbacks of Natural Pest Control
While natural pest control has its advantages, it’s not without its limitations. One of the main drawbacks is that natural methods can be more time-consuming and labor-intensive. For instance, creating physical barriers or setting traps requires effort and dedication. Additionally, natural methods may not always be as effective as chemical alternatives, particularly in cases of severe infestations. In such situations, it may be necessary to combine natural methods with targeted chemical interventions.
4. Exploring Chemical Pest Control
Chemical pest control, on the other hand, relies on the use of pesticides or insecticides to eliminate pests. These chemicals can be highly effective, offering quick results and often requiring less effort than natural methods. However, the use of chemicals raises concerns about environmental pollution, health risks, and the development of pesticide-resistant pests.
5. Weighing the Risks and Benefits of Chemical Pest Control
When considering chemical pest control, it’s essential to weigh the risks and benefits. While chemicals can provide rapid results, they can also contaminate soil, water, and air, posing a threat to local ecosystems. Moreover, the overuse or misuse of chemicals can contribute to the development of “super pests” that are resistant to treatment. However, in cases where natural methods are insufficient, targeted chemical interventions can be an effective solution.

6. Integrated Pest Management: A Balanced Approach
Integrated pest management (IPM) offers a balanced approach, combining natural and chemical methods to achieve effective pest control. IPM involves identifying the pest, assessing the infestation, and selecting a range of control methods to minimize harm to people, pets, and the environment. By adopting an IPM approach, you can create a tailored solution that addresses your specific pest control needs.
7. Conclusion
In conclusion, the choice between natural and chemical pest control ultimately depends on your specific needs and circumstances. By understanding the pros and cons of each approach, you can make an informed decision that suits your lifestyle and priorities. Whether you opt for natural methods, chemical interventions, or a combination of both, it’s essential to approach pest control with a holistic mindset, considering the potential impact on your environment and well-being. By doing so, you can create a pest-free haven that’s safe, sustainable, and effective.
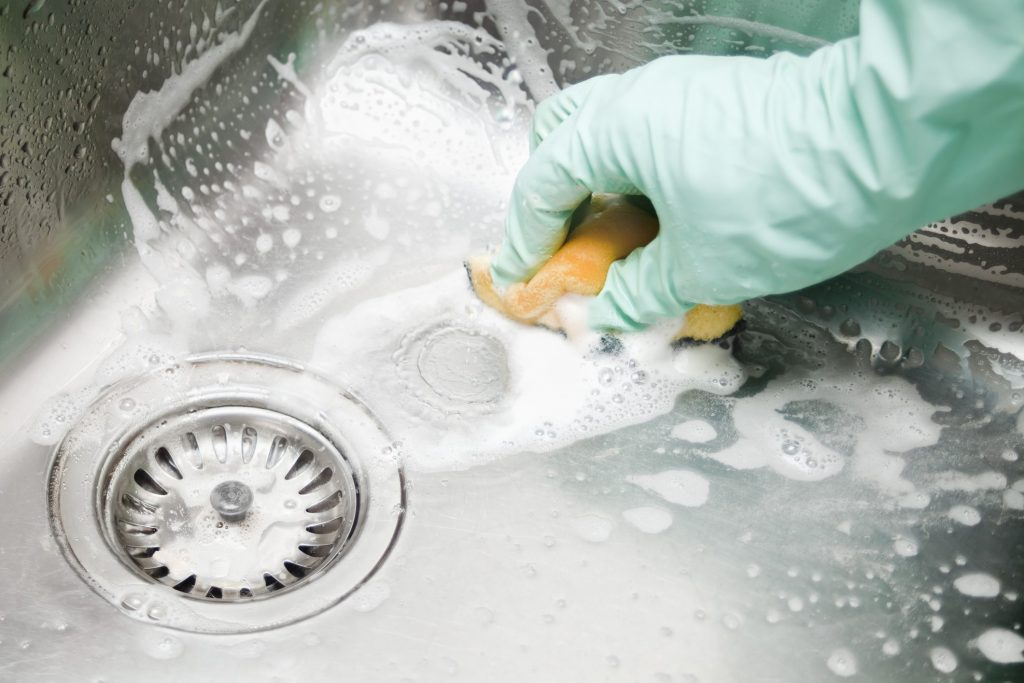
Businesses looking to maintain a clean and healthy work environment often turn to professional commercial cleaning services. Companies worldwide have long since realized that hiring an experienced and qualified team of cleaners can bring numerous benefits to their workplace. With this in mind, let’s look at some of the major advantages of investing in Chicago commercial cleaning services.
Improved Employee Health & Wellbeing
One of the main reasons why many organizations opt for commercial cleaning services is because it can help improve employee health and well-being. Studies show that employees who work in hygienic surroundings are more productive when compared to those who don’t. A good quality deep clean will remove any dirt or dust particles from carpets, furniture, windowsills, and other surfaces, which reduces the chances of people getting sick or having allergic reactions due to contact with bacteria or allergens.

Reduced Risk Of Property Damage & Losses
Another advantage of relying on Chicago-based commercial cleaning services is that it reduces the risk of property damage and losses. The cleaners use specialized products and techniques which ensure that all surfaces are cleaned thoroughly without causing any harm to them. For example, powerful steam cleaners can be used on floors and walls with minimal water usage. At the same time, professional tools such as an oscillating brush machine are great for scrubbing hard flooring surfaces like tile or terrazzo without causing any scratches or marks.
Enhanced Working Environment
A neat office space creates a pleasant working environment for everyone. It also helps create a positive impression when customers visit your premises, as they can tell how seriously you take cleanliness standards within your organization. Hiring a reliable team of professionals allows you to keep your office spick and span 24/7, giving visitors an even better impression of what you do as a business owner or manager.
Improved Safety Standards
Working in dirty conditions increases the risk of accidents due to slippery floors, poor lighting or loose cables, etc. However, regular cleaning can help reduce this danger significantly by quickly removing any obstacles or potential hazards from walkways and desks before anyone gets hurt. This is especially important if your company deals with hazardous materials on site, too as keeping things organized is key to preventing mishaps from occurring during daily operations.

Cost Effectiveness
Last but most importantly, opting for reputable Chicago-based cleaning services help businesses save money in the long run by eliminating the need for costly repairs caused by neglecting basic maintenance tasks like vacuuming carpets or mopping floors regularly enough, etc., something cleaners will take care of during, their visits so you won’t have to spend time worrying about these sorts of jobs yourself anymore!
Conclusion
As can be seen from above, there are plenty of benefits associated with relying upon experts when it comes down to keeping your company premises clean at all times – improved safety standards, enhanced working environment, reduced risks, etc., not forgetting cost effectiveness! Therefore if you’re looking for ways on how best manage your business’s hygiene requirements then certainly consider investing in professional commercial cleaning services today!
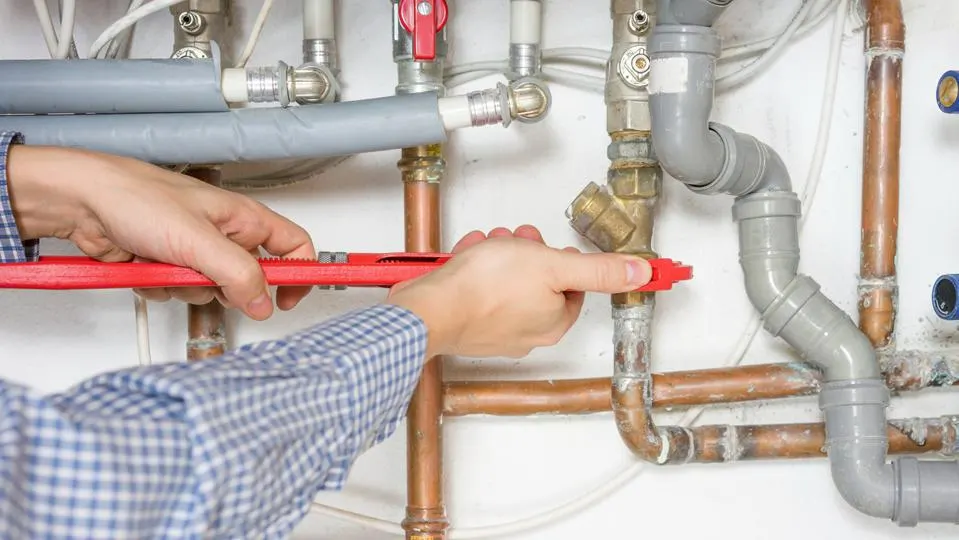
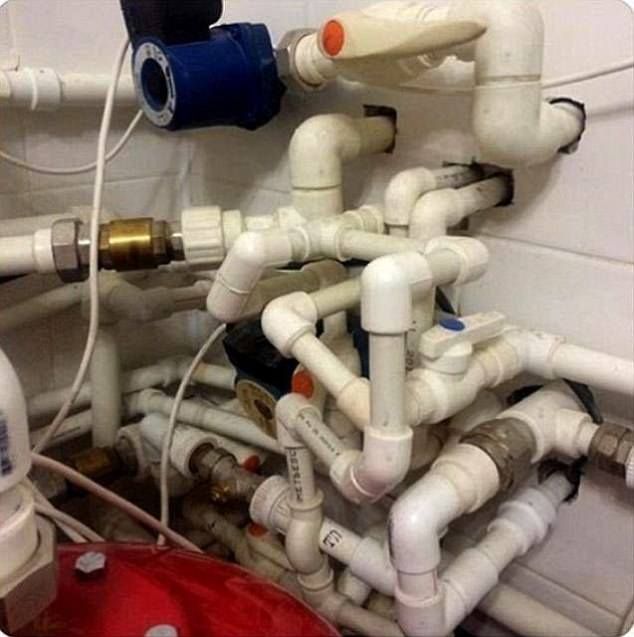
Undertaking a kitchen plumbing overhaul can be a daunting task, but with proper planning and the right υδραυλικοσ, you can maximize your kitchen space and create a functional and aesthetically pleasing environment. This guide will walk you through the essential steps and considerations for a successful kitchen plumbing overhaul.
Assessing Your Current Plumbing Layout
Before diving into the overhaul, it’s crucial to assess your current plumbing layout. Identify the locations of your sink, dishwasher, and other water-using appliances. Understanding your existing setup helps you determine what changes are necessary to optimize your space. Consulting with a professional plumber at this stage can provide valuable insights and ensure you make informed decisions.
Planning for Maximum Efficiency
To maximize your kitchen space, planning is key. Consider the workflow in your kitchen and how you can streamline tasks. Positioning the sink, dishwasher, and garbage disposal in close proximity can save time and effort. Additionally, think about installing pull-out faucets and under-sink storage solutions to enhance accessibility and organization.
Upgrading to Modern Plumbing Fixtures
One of the most effective ways to maximize your kitchen space is by upgrading to modern plumbing fixtures. Sleek, space-saving designs not only enhance the aesthetics of your kitchen but also improve functionality. Opt for compact, high-efficiency faucets, sinks, and dishwashers that fit seamlessly into your kitchen’s layout. These upgrades can reduce water consumption and provide more counter space.
Efficient Use of Under-Sink Space
The area under the sink is often underutilized. Installing pull-out shelves or drawer systems can transform this space into a highly functional storage area. These additions allow you to store cleaning supplies, garbage bins, and other essentials neatly, freeing up valuable cabinet space. A skilled plumber can help with the installation, ensuring everything is securely fitted and properly connected.
Incorporating a Kitchen Island
If space allows, incorporating a kitchen island can significantly enhance your kitchen’s functionality. A kitchen island can house additional plumbing fixtures, such as a secondary sink or a prep sink, providing more workspace and flexibility. It can also serve as a focal point for social gatherings and food preparation. Make sure to consult with your plumber to ensure the island’s plumbing is correctly integrated into your existing system.
Enhancing Ventilation and Drainage
Proper ventilation and drainage are essential for maintaining a clean and odor-free kitchen. Ensure your kitchen is equipped with efficient venting systems to expel cooking odors and moisture. Additionally, upgrading your drainage system can prevent clogs and ensure smooth water flow. A plumber can assess your current setup and recommend improvements to enhance ventilation and drainage.
Future-Proofing Your Kitchen Plumbing
When planning a kitchen plumbing overhaul, it’s important to think long-term. Consider future needs and potential upgrades. For instance, if you plan to install a water filtration system or a hot water dispenser in the future, ensure your plumbing system can accommodate these additions. Investing in high-quality materials and fixtures can also extend the lifespan of your plumbing system, reducing the need for frequent repairs and replacements.
Conclusion
A kitchen plumbing overhaul is a worthwhile investment that can greatly enhance the functionality and aesthetics of your space. By carefully assessing your current layout, planning for efficiency, and upgrading to modern fixtures, you can create a kitchen that maximizes space and meets your needs. Don’t hesitate to consult with a professional plumber to ensure your overhaul is executed smoothly and effectively. With the right approach, your kitchen can become a more enjoyable and efficient hub of your home.
Nestled in the heart of a vibrant cityscape, Norwood Grand Condos epitomize luxury living at its finest. From breathtaking views to unparalleled amenities, these condos redefine urban sophistication. Step into the world of Norwood Grand and experience a lifestyle tailored for those who appreciate the finer things in life.
Modern Elegance at Norwood Grand
At Norwood Grand, every detail exudes elegance and modernity. The architecture seamlessly blends contemporary design with functionality, offering residents a space that is both visually stunning and exceptionally livable. Whether you’re enjoying the panoramic city views from your private balcony or unwinding in the meticulously designed interiors, each moment at Norwood Grand is crafted for comfort and luxury.

Norwood Showflat: Your Gateway to Luxury Living
The Norwood Showflat provides a glimpse into the opulence that awaits at Norwood Grand. Step inside and explore meticulously curated spaces that showcase the potential of these exclusive condos. From stylish furnishings to state-of-the-art appliances, the showflat exemplifies the premium lifestyle that Norwood Grand offers to its residents.
Unmatched Amenities for Every Lifestyle
Imagine starting your day with a rejuvenating swim in the infinity pool overlooking the city skyline, followed by a workout in the fully equipped fitness center. At Norwood Grand, residents have access to a comprehensive range of amenities designed to cater to every need and desire. Whether you prefer relaxing in the spa, hosting gatherings in the entertainment lounge, or enjoying a quiet moment in the landscaped gardens, Norwood Grand ensures a lifestyle of luxury and convenience.
Prime Location, Endless Opportunities
Located in a prime urban location, Norwood Grand places residents in the midst of the city’s best dining, shopping, and entertainment options. With easy access to major transportation routes, every corner of the city is within reach. Whether you’re exploring cultural attractions or simply enjoying a night out, Norwood Grand provides the perfect starting point for urban exploration.

Your Gateway to Urban Luxury
Norwood Grand isn’t just a place to live; it’s a lifestyle choice. With its unparalleled blend of elegance, convenience, and community, Norwood Grand offers residents a chance to live life to the fullest. Discover a new standard of luxury living and make Norwood Grand your next home in the heart of the city.
Conclusion
In conclusion, Norwood Grand Condos set a new benchmark for luxury living in the city. With its sophisticated design, unmatched amenities, and prime location, Norwood Grand offers residents an opportunity to live the high life they’ve always dreamed of. Explore the Norwood Showflat today and envision the possibilities of calling Norwood Grand your home.
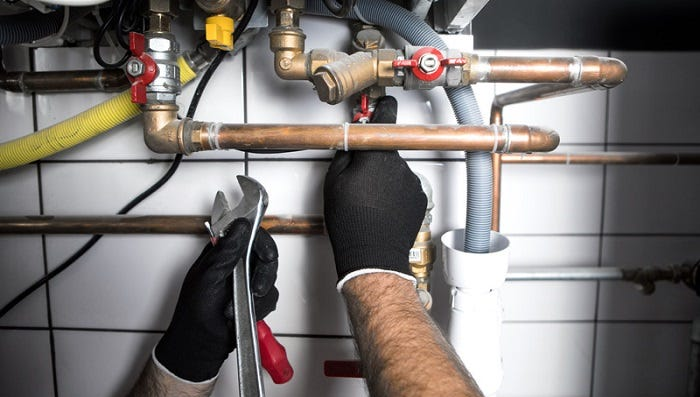
Choosing the right plumber for your home can be a daunting task. Whether it’s a minor repair or a major installation, finding a reliable professional is crucial. Here, we provide top tips and ideas to help you select the best υδραυλικος αθηνα has to offer for your needs.
1. Determine Your Plumbing Needs
Before you start your search, it’s essential to understand your specific plumbing requirements. Are you dealing with a simple leak, a clogged drain, or a complete bathroom remodel? Knowing the nature of the job will help you find a plumber with the right expertise.
2. Ask for Recommendations
One of the best ways to find a trustworthy plumber is through recommendations from friends, family, or neighbors. Personal experiences can provide valuable insights into the quality of service and reliability of a plumber. If someone you trust had a positive experience with a plumber Athens residents recommend, it’s a good sign you might too.

3. Check Credentials and Licensing
Ensure that the plumber you hire is licensed and insured. A licensed plumber has met the necessary training and experience requirements, while insurance protects you from potential damages or injuries that may occur during the job. Verify these credentials before making a decision.
4. Read Online Reviews
Online reviews can be incredibly helpful in assessing the reputation of a plumber. Look for reviews on trusted websites like Google, Yelp, or the Better Business Bureau. Pay attention to both positive and negative feedback to get a balanced view of the plumber’s performance.
5. Get Multiple Quotes
It’s a good idea to get quotes from several plumbers before making your choice. This allows you to compare prices and services, ensuring you get the best value for your money. Be wary of unusually low quotes, as they may indicate subpar service or hidden costs.
6. Ask About Experience
Experience matters in plumbing. Ask potential plumbers about their experience with the specific issue you’re facing. A plumber with a solid track record in similar jobs is more likely to deliver quality work.
7. Inquire About Guarantees and Warranties
A reputable plumber should offer guarantees or warranties on their work. This ensures that if something goes wrong after the job is completed, they will come back to fix it without additional charges. Always clarify the terms of any guarantees or warranties offered.
8. Evaluate Communication Skills
Good communication is crucial in any professional relationship. Pay attention to how the plumber communicates during your initial interactions. Are they prompt in responding to your inquiries? Do they explain the issues and solutions clearly? Effective communication can prevent misunderstandings and ensure the job is done to your satisfaction.
9. Consider Availability and Response Time
Plumbing issues can arise at any time, often requiring immediate attention. Find out if the plumber offers emergency services and how quickly they can respond to urgent requests. A plumber who is available 24/7 can be a lifesaver in a plumbing emergency.
10. Check for Professionalism
Professionalism is an indicator of a plumber’s dedication to their trade. Look for signs of professionalism such as a neat and clean appearance, punctuality, and a well-maintained vehicle and tools. A professional plumber is more likely to respect your home and provide high-quality service.

Conclusion
Choosing the right plumber for your home doesn’t have to be overwhelming. By following these top tips and ideas, you can find a reliable and skilled plumber Athens homeowners trust. Remember to determine your needs, ask for recommendations, check credentials, read reviews, get multiple quotes, inquire about experience, guarantees, and communication skills, and consider availability and professionalism. With these guidelines, you’ll be well-equipped to make an informed decision and ensure your plumbing issues are handled efficiently and effectively.
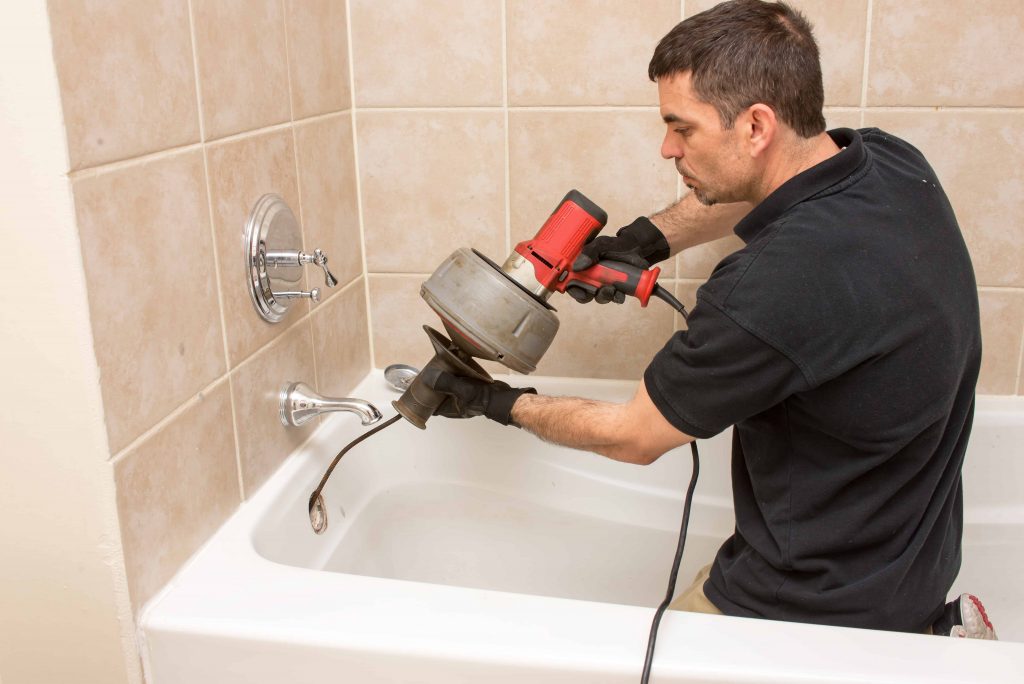
Drain clogs can be a plumber’s worst nightmare, causing headaches for both professionals and homeowners alike. From minor blockages to major obstructions, tackling these issues efficiently requires not only expertise but also the right set of tools. In the realm of plumbing, having the best crimping tools for secure pipe connections is just the beginning of what it takes to conquer clogs like a pro.
Understanding the Importance of Drain Cleaning Tools
Before diving into the specifics of drain cleaning tools, it’s crucial to grasp why having the right equipment matters. Effective drain cleaning not only resolves immediate blockages but also prevents future issues, saving time, money, and hassle in the long run. With the right tools at their disposal, plumbers can deliver efficient and reliable services, ensuring optimal functionality of drainage systems.
The Versatility of Drain Augers
Among the most essential tools in a plumber’s arsenal is the drain auger, also known as a plumbing snake. These flexible and sturdy instruments come in various sizes and shapes, allowing plumbers to navigate through pipes and dislodge stubborn clogs efficiently. Whether it’s a handheld auger for smaller drains or a motorized version for larger-scale projects, having this versatile tool can make a world of difference in clearing obstructions.
Power of Hydro-Jetting Systems
For more severe clogs or heavily congested pipes, hydro-jetting systems offer a powerful solution. These high-pressure water jets can blast through blockages, including grease, scale, and tree roots, restoring proper flow and drainage. While hydro-jetting requires specialized equipment and training, its effectiveness in tackling tough clogs makes it a valuable asset for professional plumbers.
Importance of Inspection Cameras
In the realm of drain cleaning, visibility is key. Inspection cameras allow plumbers to peer into pipes and identify the root cause of blockages with precision. By pinpointing the problem areas accurately, plumbers can devise targeted solutions, minimizing guesswork and unnecessary disruptions. Investing in high-quality inspection cameras is a wise decision for any plumbing professional aiming to deliver top-notch service.
Utilizing Chemical Drain Cleaners Wisely
While mechanical tools are often the preferred choice for drain cleaning, chemical drain cleaners can also be effective when used judiciously. However, it’s essential to exercise caution and follow safety guidelines, as these products can be corrosive and harmful if mishandled. When applied correctly and in appropriate situations, chemical drain cleaners can complement mechanical methods, providing an extra layer of defense against stubborn clogs.
Best Practices for Preventive Maintenance
In addition to addressing existing clogs, plumbers play a vital role in preventive maintenance. Educating clients about proper disposal practices and regular drain cleaning can help mitigate future issues, extending the lifespan of plumbing systems and reducing the need for emergency repairs. Plumbers can foster long-term relationships with satisfied customers by incorporating preventive maintenance into their service offerings.
Investing in Quality Tools Pays Off
In the dynamic world of plumbing, having the right tools can mean the difference between success and frustration. From drain augers and hydro-jetting systems to inspection cameras and chemical cleaners, each tool serves a specific purpose in the battle against clogs. By investing in quality equipment and staying abreast of technological advancements, plumbers can enhance their efficiency, reputation, and ultimately, their bottom line.
In conclusion, conquering clogs like a pro requires a combination of expertise and the right tools for the job. Plumbers can confidently tackle any challenge with a comprehensive toolkit that includes the best crimping tools for secure pipe connections, drain augers, hydro-jetting systems, inspection cameras, and chemical cleaners. By prioritizing preventive maintenance and investing in quality equipment, professionals can ensure smooth-flowing drains and satisfied customers for years to come.
In the ever-evolving world of architecture and interior design, homeowners are increasingly seeking innovative solutions to enhance their living spaces’ aesthetic appeal and functionality. Window design is a crucial aspect that often takes center stage in this quest for modernity. Windows not only allow natural light to flood into our homes but also play a pivotal role in the overall ambiance and energy efficiency. The options for those considering window installation in Gothenburg, where design meets functionality, are diverse and exciting.
1. Smart Windows Revolutionizing Energy Efficiency
Smart windows have emerged as a groundbreaking innovation in the pursuit of sustainable living. These windows can dynamically adjust their tint based on external conditions, helping regulate indoor temperatures and reduce the reliance on artificial heating or cooling systems. Homeowners in Gothenburg, known for its diverse weather patterns, can benefit significantly from the energy-efficient features of these smart window designs.
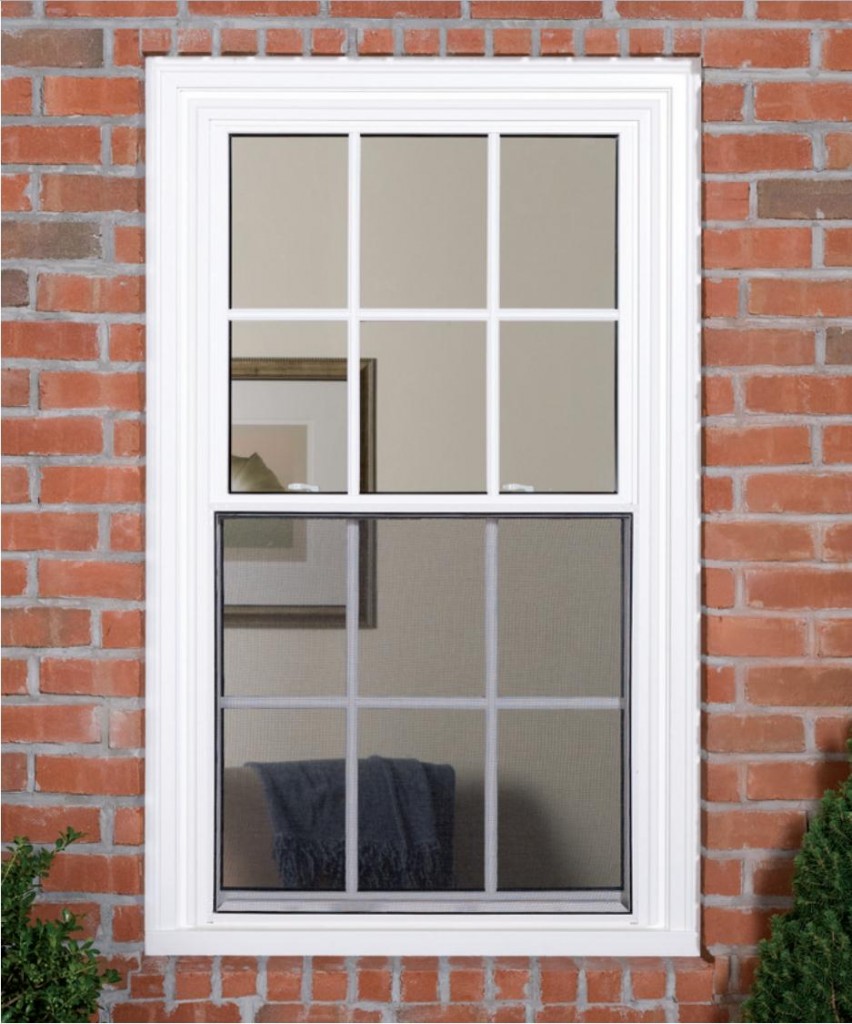
2. Frameless Elegance for a Seamless View
Breaking away from traditional window frames, the trend of frameless windows has gained popularity among modern homeowners. These sleek, minimalist designs provide an unobstructed view of the surrounding environment, blurring the boundaries between indoor and outdoor spaces. The frameless window trend is perfect for those looking to maximize natural light and create an open, airy atmosphere in their homes.
3. Bi-Fold and Sliding Windows for Versatility
When it comes to balancing aesthetics with functionality, bi-fold and sliding windows take the spotlight. These innovative designs allow homeowners to connect their living spaces to the outdoors seamlessly. Particularly popular in Gothenburg, where the picturesque landscapes demand attention, these windows provide the flexibility to create expansive openings, effortlessly merging the interior and exterior environments.
4. Dynamic Shapes and Geometric Designs
For the avant-garde homeowner with a penchant for artistic expression, dynamic shapes and geometric window designs offer a creative solution. Unconventional shapes, such as trapezoids or hexagons, can transform a window into a captivating focal point. This trend not only adds a touch of uniqueness to the home but also allows for customized arrangements that complement the architectural style of the residence.
5. Multi-Functional Windows: From Transparent to Opaque
Innovations in window technology have led to the development of windows that can transition from transparent to opaque at the touch of a button. These multi-functional windows are ideal for maintaining privacy without sacrificing natural light and cater to the modern homeowner’s desire for adaptable living spaces. Residents in Gothenburg can appreciate the versatility of these windows, especially in a city that values both privacy and luminosity.
6. Sustainable Materials and Eco-Friendly Designs
As environmental consciousness continues to grow, homeowners increasingly opt for sustainable materials in their window designs. Eco-friendly options, such as recycled glass and responsibly sourced wood, contribute to a greener planet and add authenticity to the home. Choosing such materials aligns with Gothenburg’s commitment to sustainability and harmonious living.
7. Integration of Smart Home Technology
In the era of smart homes, integrating technology with window design has become a game-changer. Motorized windows, controlled through smartphones or voice commands, offer unparalleled convenience. This innovation is particularly relevant for the modern homeowner in Gothenburg, where technology seamlessly blends with the city’s progressive urban lifestyle.
8. Customized Window Solutions for Every Home
Acknowledging that each home is unique, customized window solutions are gaining momentum. From custom shapes and sizes to personalized features that cater to specific needs, homeowners in Gothenburg can now tailor their windows to align perfectly with their individual tastes and preferences.

In conclusion, the world of window design is evolving at an unprecedented pace, offering many options for the modern homeowner. Whether seeking energy efficiency, aesthetic appeal, or a seamless integration of technology, there is a window design to suit every taste and requirement. For those contemplating window installation in Gothenburg, the city’s rich architectural tapestry provides the perfect canvas to explore these innovative designs and elevate the living experience.
Moving furniture can be a daunting task, requiring time, effort, and often a fair amount of frustration. Whether relocating to a new home or simply rearranging your living space, the physical demands of moving heavy and bulky furniture can be overwhelming. This is where the services of Furniture Moving Professionals come into play, offering a convenient solution to ease the burden of this challenging endeavor.
The Convenience Factor
One of the primary reasons individuals opt for furniture moving services is the undeniable convenience they provide. Dismantling, packing, and transporting furniture require specialized skills and equipment that professional movers bring. Hiring experts in the field ensures a seamless and hassle-free experience, allowing you to focus on other aspects of your move or enjoy your newly arranged space.

Time-Saving Benefits
Time is a precious commodity, and moving furniture can consume much of it. Furniture moving professionals are trained to handle the intricacies of the job efficiently, minimizing the time required to complete the task. This not only speeds up the moving process but also allows you to settle into your new environment more quickly.
Protective Measures
Furniture is an investment, and the last thing you want is to see your prized possessions damaged during a move. Professional movers employ various protective measures, such as using specialized padding, wraps, and securing techniques, to ensure your furniture arrives at its destination in pristine condition. This level of care is often challenging to replicate without the expertise of dedicated furniture moving services.
Cost-Effective Solutions
While some might view hiring furniture moving professionals as an added expense, it can, be a cost-effective solution. Considering the potential damage to furniture, the time and effort saved, and the reduced stress associated with professional services, the overall value becomes apparent. Moreover, many moving companies offer competitive pricing and customizable packages to cater to different needs and budgets.
Tailored Services
Every move is unique, and furniture moving professionals recognize the importance of personalized services. From packing delicate items to handling oversized furniture, these experts adapt their approach to suit your specific requirements. This tailored service ensures that your belongings are treated with the care and attention they deserve, adding an extra layer of reassurance during the moving process.

Peace of Mind
One of the most significant benefits of hiring furniture moving professionals is the peace of mind they bring. Knowing that experienced hands are handling the logistics allows you to focus on other aspects of your move or take a well-deserved break. This mental relief is invaluable, especially during a time that can be stressful for many.
In conclusion, while the cost of convenience associated with furniture moving services may seem like an additional expense, the value they bring in terms of time, protection, and peace of mind often outweighs the financial considerations. Whether you’re moving locally or across borders, enlisting the help of furniture moving professionals can turn a potentially arduous task into a smooth and efficient experience.
Moving can be stressful, but it doesn’t have to be if you know the right questions to ask when hiring movers. If you need moving services in Arlington Heights, IL, make sure to research your options and ask the following five questions before making a decision:
1. What Services Do You Offer?
Before settling on any moving company, make sure they offer all the services you require. Do they provide packing services? Are they willing to move appliances and other large items? An experienced and reliable mover should have a wide range of available options to meet all your needs.

2. How Much Will It Cost?
When searching for movers in Arlington Heights, IL, always get an estimate of how much the move will cost before agreeing to anything. Make sure the quote is accurate and comprehensive – it should include labor costs, supplies like boxes and tape as well as any additional fees such as for stairs or bulky furniture. Additionally, note whether there are any hidden fees or additional charges that may arise during the move.
3. Are You Licensed & Insured?
Don’t hire a moving company without first verifying their licensing and insurance information. Reputable companies should carry liability insurance covering damages due to negligence and worker’s compensation insurance protecting their employees while on the job. Furthermore, most states also require professional movers to have special licenses certifying them as qualified professionals within this industry – double check with your local DMV before signing any contracts with potential movers.
4. How Long Have You Been In Business?
To determine whether or not a particular mover is reliable and trustworthy, find out how long they’ve been operating in Arlington Heights, IL – look for customer reviews online if possible! Generally speaking, more experience usually translates into higher quality service as these companies have had time to perfect their processes over time through trial and error – choose a company with at least 3 years experience in the field for best results!
5. Can I see your references?
Any reputable removal company should be happy to provide references from previous clients on request – call around and ask about their experience of working with each company to ensure you’re choosing someone who puts customer satisfaction above all else! Also, don’t hesitate to contact the Better Business Bureau (BBB) if you’re looking for extra peace of mind – BBB-accredited providers are required to adhere to strict standards of excellence when providing goods/services!

The bottom line
Hiring professional removals companies can save you time and hassle throughout your move, but only if you choose one that is able to meet your individual requirements. Asking these five key questions beforehand can help ensure you receive a quality service from start to finish, so don’t forget to do your due diligence!
When winter approaches, it’s important to make sure your home plumbing system is ready to face the cold temperatures. Taking steps ahead of time can save you from emergency υδραυλικος visits and costly repairs. Here’s a guide on how to prepare your plumbing system for winter.
1) Insulate Exposed Pipes:
One of the most effective ways to prevent freezing pipes in your home is by insulating all exposed pipes with foam or fiberglass sleeves. If done properly, this will help keep your water lines above freezing temperatures and prevent them from cracking due to extreme weather conditions. An experienced plumber can help ensure that all pipes are insulated correctly and securely wrapped.
2) Clean Gutters and Drains:
During fall, leaves and other debris may clog up drains and gutters near the house, so it’s important that these areas are cleared out before winter arrives. A professional plumber should be able to check the condition of these areas, as well as make any necessary repairs if needed.
3) Check Heating Systems:
You must have an efficient heating system for those frigid winter months, otherwise, frozen water lines could be a problem. Before turning on your furnace, a licensed plumber can inspect your air ducts for dust accumulation or potential blockages caused by pests or rodents during the summer months. An inspection like this should also include checking gas connections, filters and thermostats too in order to avoid carbon monoxide leaks or fires within the home due to faulty wiring systems.
4) Unplug Outdoor Hoses:
Ensure all garden hoses are removed from outdoor faucets before temperatures drop below freezing levels. Leaving them attached may cause pipe breakage due to ice buildup inside the hose nozzle. It’s also important that you shut off valves leading into these outside hoses in order to prevent flooding when temperatures start rising again come springtime!
5) Keep The Heat On Low:
When preparing for colder weather, it’s recommended not to turn the heat off completely, but instead set thermostats at 55 degrees Fahrenheit day and night to maintain heat inside pipes throughout the winter months – especially if they’re not properly insulated or located near exterior walls of homes, which tend to receive less heat circulation than other parts of the house! This will help reduce the chances of having frozen pipes later down the line as well as potentially saving energy costs in the long run too, as running furnaces continuously uses a lot of electricity overtime compared to when they are only running intermittently (such as at lower temperature settings).
6) Monitor water pressure levels:
As snow piles up outside during the winter season, there is a chance increased pressure could build up around the main supply line, which then leads to burst pipe fittings inside the home if left unchecked; therefore, monitor water pressure levels regularly (at least once a month) while ensuring correct readings each time (ideally between 40-60 psi), be sure to contact local authorities immediately if high numbers are detected – as this potentially means serious damage has already been done internally causing further complications down the road without proper intervention soonest possible!

7) Install emergency valves:
Last, but certainly not least, installing emergency valves near water mains helps immensely in dealing with unexpected issues that arise such as broken pipes during harsh weather conditions – in fact many cities now require the installation of certain types of valve systems before issuing permits for new housing developments, construction sites alike due to their effectiveness in preventing flooding both residential and commercial properties alike, while still allowing access for pipe repair work even in the worst case scenarios where isolation is needed, fast response times matter most! By taking the preventative measures mentioned above along with adhering to local regulations applicable regarding installation & maintenance of such devices accordingly, one should easily protect themselves peace of mind knowing their family is safe no matter what Mother Nature throws their way each year comes around again after another…
3D printing is a rapidly emerging technology that has evolved from simply being able to make small items like toys, to now having the potential of constructing entire homes. This promises to revolutionize the construction industry by drastically reducing costs, increasing speed and efficiency, and allowing for greater design creativity. However, with this new technology comes a whole host of challenges and opportunities related to regulations surrounding 3D printed houses.
Understanding Building Regulations
As with all new construction technologies, building codes and regulations must be followed before a structure can be considered safe and habitable. These rules exist for safety and aesthetics; some local governments may have rules about what type of materials can be used or how much square footage certain structures can occupy on a given piece of land. Understanding these building regulations is essential in order to ensure that the 3D printed house meets all requirements.

Navigating Planning & Zoning Regulations
In addition to understanding building regulations, developers need to consider any planning or zoning restrictions that might apply in their area when considering an application for a 3D printed house. Every region has different rules regarding where certain types of buildings can be located and what kinds of activities are allowed within those areas; these restrictions should be taken into account when designing a 3D printed home so as to avoid running afoul of local laws.
Exploring Funding Options
Building a 3D printed house requires significant upfront capital, especially if one wants to utilize specialized equipment such as robotic arms or advanced software programs to print out the structure. Securing funding for such projects can prove difficult because most traditional financial institutions have yet to become familiar with this new technology and thus may hesitate before investing money into it. As such, exploring alternative funding options such as crowd-funding campaigns or government grants is often necessary for developers to move forward with their project.
Minimizing Environmental Impact
The environmental impact of 3D printed houses also needs careful consideration during development. While they offer many advantages over traditional construction methods (such as using fewer resources), they also require large amounts of energy, potentially harming the environment if not managed properly. Taking steps such as using renewable energy sources or recycling materials wherever possible will help to minimize any negative environmental impact caused by the construction of 3D printed homes.
Drive adoption through education and outreach
Finally, developers and local authorities alike need to promote awareness of this innovative new technology through education and outreach efforts aimed at both builders and consumers.This will help increase adoption rates by making people more comfortable with experimenting with something unfamiliar, such as 3D printed homes, rather than relying solely on traditional methods, such as stick and brick construction, every time they decide to build something new.

Reaping the benefits of new technology
Ultimately, the adoption of regulation around 3D printers offers builders – whether they’re individual homeowners embarking on DIY projects or larger contractors looking to increase production – the opportunity to reap all the benefits associated with this cutting-edge technology: faster completion times, lower costs, creative designs, reduced environmental impact, etc. With continued innovation, we will soon see even more exciting developments in what we can create with 3D printers.