 Burke Knows Words A vision for your life
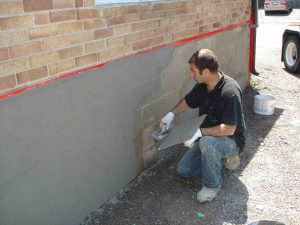
Tired of looking at those cold and bare, unfinished concrete basement walls? Think it’s too hard to tackle yourself? Think again! Read on for some options you have and special tips along the way.
Having a home with a basement can be a big time kicker in adding value to the overall price tag, that is if it’s a finished basement. Having a basement that’s finished raises the overall livable space of a home. It’s pretty simple really, a home with an unfinished basement has less square footage of livable space than a home that has a finished basement. One of the items to completing the look of a finished basement deals with those bare concrete walls. If you are looking to clean it all up, this should help you along the lines of how to finish concrete basement walls.
There’s really three options you have with this. The first one, probably doesn’t fit you as that’s why you are here in the first place, is that the basement is finished as part of building the house. These could be a new home or maybe an older home that you bought but the basement was already done when you got the home. The second option is to simply hire a contractor to finish it all out. And the third, which is probably why you are here, is to finish the basement walls yourself if you have the skills and time. You will still need to buy all the construction materials yourself, but you’ll save quite a bit by cutting out the time and labor charged from a general contractor. Here’s a couple of different options on how to finish concrete basement walls.
Furring Strips with Foam Insulation
We’ll start with the least desirable of the two eventhough it’s probably actually easier then the other option a little farther down line and that’s to use some simple furring strips and foam insulation to fake out your wall. Since you are really only going to be having the foam insulation between your drywall and concrete wall, there’s really no need to use 2×4′s as your furring strip. Suggest to use 2×2′s instead. You’ll want to secure these 2×2′s to the overhead floor joists and then also down the wall in a vertical pattern with some sturdy concrete screws. You don’t need many, probably 3 or 4 strategically placed screws per furring strip would suffice. Once you’ve got your furring strips in place, get that foam insulation out and start cutting pieces to fit in between your furring strips. The least amount of cuts you have to make the better so measure those furring strips appropriately! Once you’ve got the foam sheets fitting correctly between the furring strips, take it down and apply some adhesive to the back of it using a caulking gun generously around it until the bead runs from top to bottom. Just go from side to side as you work your way down the sheet leaving about an inch or so between the current bead and the upper bead until you reach the bottom. Pick it back up and press it in place. Be sure to apply even pressure over the board (pushing on the top, middle, and bottom) so that it secures properly. Give it about 30 seconds for the glue to take hold before you let go and move on to your next piece. One thing to note here, if you haven’t run your electricity to the outlets and stuff, plan to mix this in during the process as it gets rather tight as you are working with a lot less space. After you’ve got all the foam insulation up and in place, you can move on to the drywall. Install the drywall right over the top of it all using some standard one and a quarter inch drywall screws. Wa-la. You’ve just finished your concrete basement walls. In the long, run you’ll save some flooring space if your basement is small using this method, but if you are going to spend a lot of time down there, it’s probably not going to be worth the hassle you’ll run into trying to run all the wiring and outlets as there simply no room to “do it later” without really tearing something up.
Conventional Framed Wall
This method of framing a concrete basement wall is probably by far the most common and popular. Instead of the 2X2′s and foam insulation, this time on the trip to the hardware store your going to want to pick up some 2×4′s. I’m not going to tell you everything here on how to do this as there are simply a ton of resources online and elsewhere that cover building a conventional framed wall, but I will give you a couple of tips. Get enough to go from corner to corner in the entire basement. When you start building your wall, make sure that the 2×4 bottom plates are pressure treated (this will help them last a lot longer due to the conditions of a basement) to mount the 2×4′s to. The top of the frame should be mounted to the upper floor joists for support. To insulate them when you are done framing, you can use the standard fiberglass insulation, no need for the foam insulation here. The downfall with this type of framing on basement walls is that you lose some space, not much, but about 6 inches per wall. If your basement is really small this could be a problem. The upside though is that since you are finishing it out probably means you are going to be spending some time down there and this type of installation leaves you a lot of room to work that wiring to all those new outlets and switches to power up those big screen TV’s and sound systems (or blenders and bar accessories, or whatever else you may be doing).

How Much Does It Cost
This is probably one of the most important pieces that anyone wants to know is how much does it cost to finish basement walls? The answer? Well it’s really not a good one as quite honestly every situation and basement is practically different and depending on the way you go depends a lot on the overall bottom line of the whole deal. It’s one that you are just going to have to price out for your basement yourself. I know, that’s not the greatest answer or probably what anyone would want to hear but it’s true. Every job is different. Check around with some of the local contractors in your area and just get some estimates. If they are reasonable and it fits your budget, go for it. If not, take their estimates (and take notes when they are doing it) and price it out yourself if you were to do the work. What you are going to find is that overall, the contractors may get a better rate on the materials, but can you afford the time and labor portion of it or is it worth it to simply do it yourself, that should be your deciding factor. One other thing to consider if you do attempt this, it takes a bit of time. Plan on spending 2-5 days (dependant on the job) to do it yourself as it’s not something your likely going to finish in a single day.